NX Witness – Reviewing and Downloading Footage
Overview
This guide covers everything you need to find, review, and export footage from your Nx Witness CCTV system. No administrator access is required for these tasks but you do need at least Advanced Viewer to review recorded footage.

1. Opening a Camera
Log in to the Nx Witness Desktop Client using your Cloud Account (don’t log into the system by selecting server, this is local login and only needed if your site has no internet).
In the Resource Tree (left panel), locate your camera and double-click it to open it on screen.
The camera will open in Live mode by default.
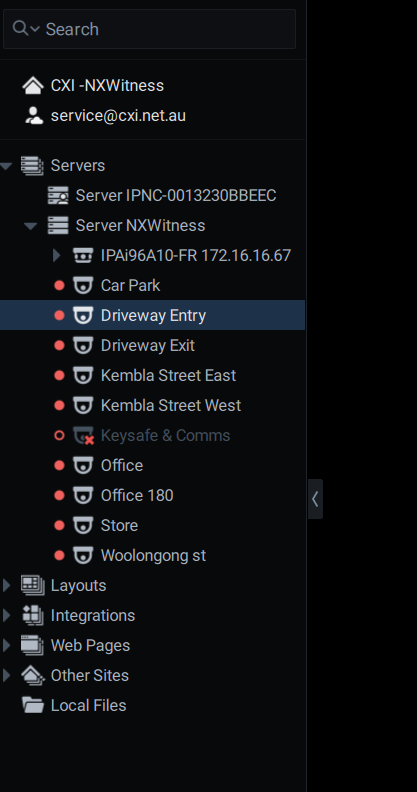
Left side navigation tree
2. Navigating to Recorded Footage
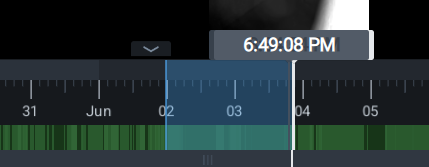
The timeline runs along the bottom of the screen. Recorded footage appears as green segments on the timeline.
To jump to a specific time:
Click directly on the timeline at the time you want to review.
Or drag the playhead (the vertical time slider) to your desired position.
To zoom in on the timeline for precision:
Scroll your mouse wheel over the timeline to zoom in or out from 500 miliseconds (in) to months (out)

Playback controls:
-
Click the Play button in bottom left corner or press the ‘Spacebar’
-
Press ‘Ctrl + Right Arrow’ or use the speed slider in bottom left hand corner
-
Press ‘Ctrl + Left Arrow’ or the rewind button in the bottom left hand corner
-
Pause first, then press Ctrl + Right / Left Arrow
-
Press L or click the LIVE button in bottom right hand corner
Note: Recorded footage only exists in the green areas on the timeline. Clicking in a grey/empty area will jump to the next available recorded segment. If the camera(s) show “No Data” then there is no recorded footage for that time period.
3. Exporting (Downloading) Footage
Step 1 – Select the camera
Click on the camera feed you want to export so it is highlighted on screen.
Step 2 – Select the time range
On the timeline, right-click and drag across the period you want to export.
Alternatively:
Left-click and hold on the timeline and drag the blue highlighted section across either left or right
Let go of the Left button when you want to stop and mark the end of the selected area
Drag the edges of the selection to fine-tune the range.
Tip: Zoom the timeline in first using your mouse wheel to make precise selections easier.
Step 3 – Start the export
Right-click on the highlighted timeline section and select Export Selected Range.
If this option is greyed out, there is no recorded footage in your selected range.
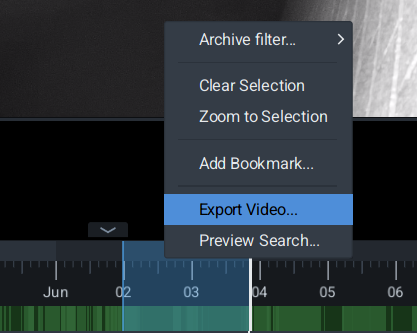
Right click on the highlighted section to bring up the menu
Step 4 – Choose format and save location
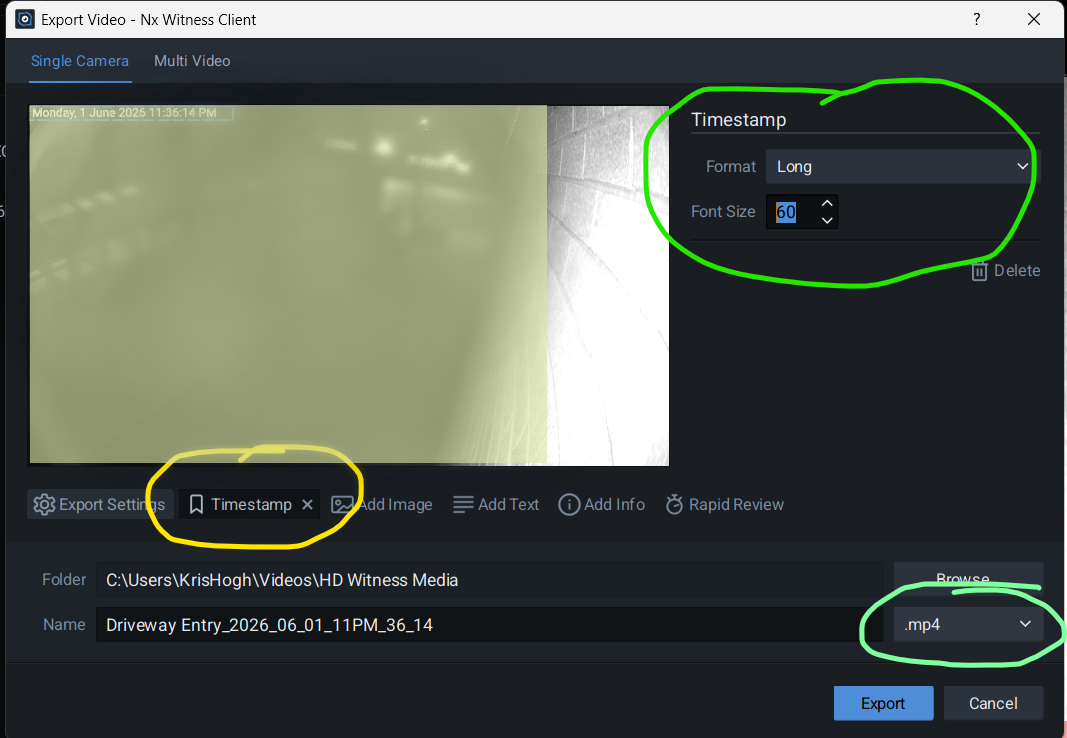
A save dialog will appear. Choose the following recommended settings:
Timestamp (YELLOW) - select the timestamp button to display the timestamp from NX Witness
Timestamp (GREEN) - use these settings to show the timestamp from NX Witness
File output format (BLUE) - use MP4 as the output file format
-
Standard video file. Compatible with most players and has an excellent quality vs compression ratio. (Recommended for most users)
-
Standard video file. Compatible with most players. May require H.264 codec.
-
Higher quality, wider codec support, but may not play on some older devices.
-
Self-contained file. Opens its own viewer. No media player or codec needed. Windows only. Not suitable for handing to Police.
Choose your save location, name the file, and click Save.
The export will run in the background. You can continue using Nx Witness while it processes.
Step 5 – Locate the exported file
Once complete, the exported clip will appear under Local Files in the Resource Tree (left panel) or in Windows in C:\Users\[YOUR PROFILE NAME]\Videos\HD Witness Media\ if you left everything as default.
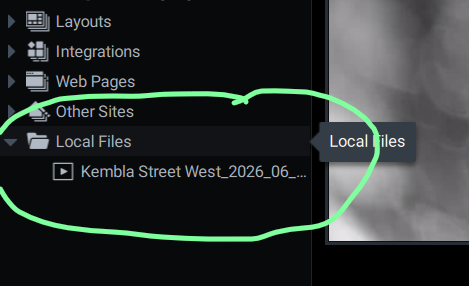
Recently exported files show here on the navigation panel
Important: This entry disappears when you restart the client. Save the file to a permanent location (USB drive, shared folder, etc.) before closing Nx Witness.
4. Common Issues
"Export Selected Range" is not available The selected time range contains no recorded footage. Try adjusting your selection to cover a green area on the timeline.
The exported AVI won't play Install a free codec pack such as K-Lite or VLC Media Player, which handles H.264 natively.
I can't see my camera in the Resource Tree Contact your system administrator. You may not have view permissions assigned to that camera. Instead navigate to Windows File Explorer (or similar) and go to C:\Users\[YOUR PROFILE NAME]\Videos\HD Witness Media\
5. Need Help?
Contact CXI for support